Why You’ll Love This Gluten Free Danish Recipe
Whether you’re gluten intolerant or just looking to try something new, you’ll love this gluten-free Danish recipe because it delivers all the deliciousness of a traditional pastry without the gluten.
I can’t tell you how satisfying it’s to bite into a warm, flaky Danish filled with sweet raspberry jam. The texture is spot on, and the flavors are incredible.
Plus, it’s simple to make, so you won’t spend hours in the kitchen. I love that I can whip these up for breakfast or brunch, impressing friends and family while keeping my dietary needs in check.
You’ll definitely want to try this!
Ingredients of Gluten Free Danish
When it comes to baking, especially gluten-free, having the right ingredients is key to achieving that delightful taste and texture we all crave. This gluten-free Danish recipe is no exception. With a mix of traditional flavors and alternative ingredients, you’ll be amazed at how easy it’s to whip up delicious pastries right in your own kitchen.
So, let’s gather what we need to get started on this tasty adventure.
Here’s what you’ll need:
- 2 tablespoons shortening
- 1/4 cup honey
- 1 egg
- 1 tablespoon yeast
- 1/2 cup sour cream
- 1/4 cup potato starch
- 3/4 cup cornstarch
- 1/4 teaspoon baking soda
- 1 teaspoon baking powder
- 1 teaspoon xanthan gum
- 1/2 teaspoon salt
- 1/2 teaspoon vinegar
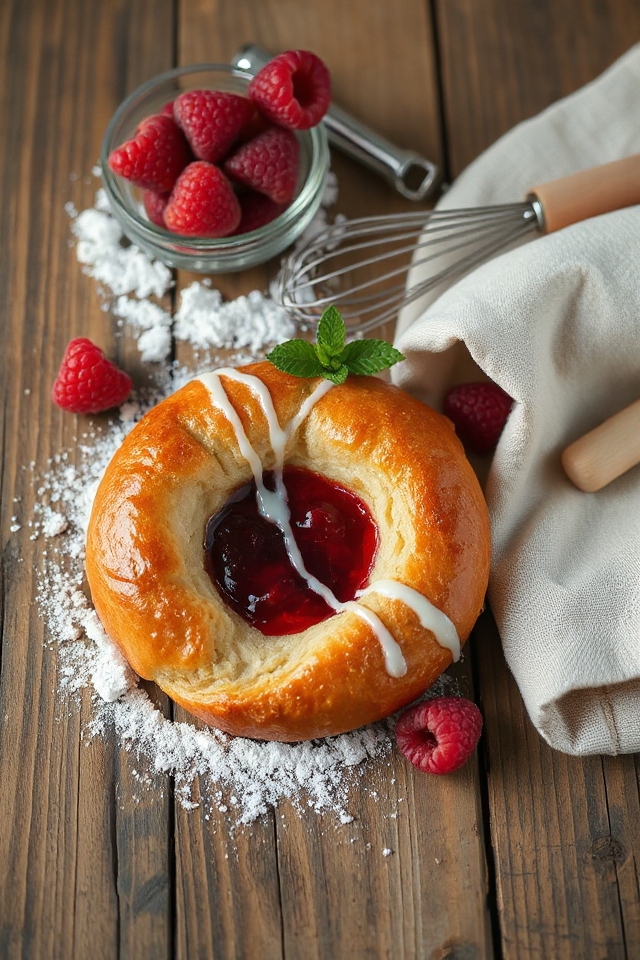
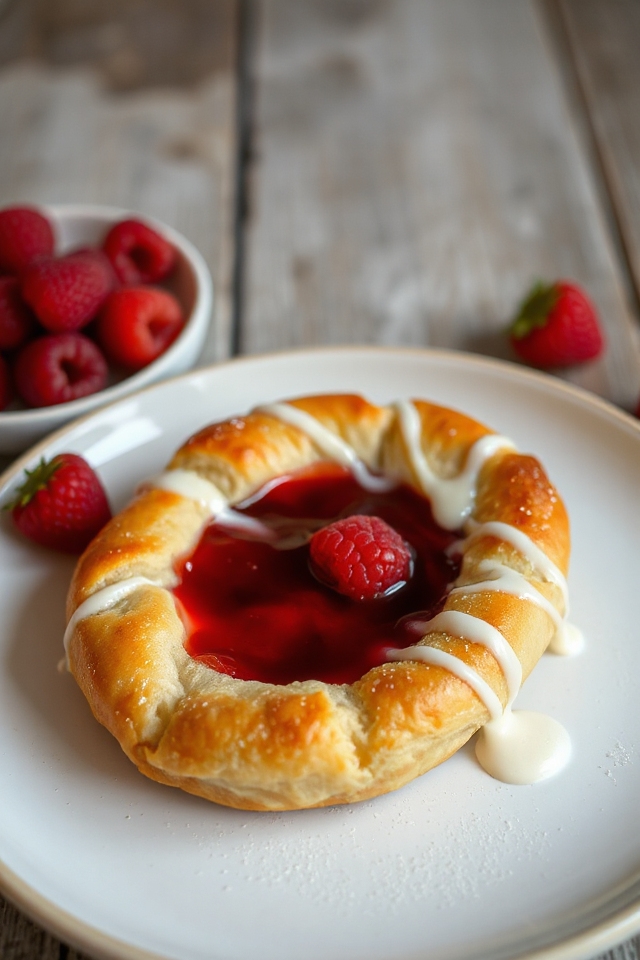
- Raspberry jam (about 1 tablespoon on each Danish)
- Powdered sugar (for icing)
Now, let’s chat a bit about the ingredients. Shortening is a great fat to use here because it helps create that lovely flaky texture we love in pastries. If you’re feeling adventurous, you could even try substituting it with butter, but remember, that might change the flavor a bit.
Honey sweetens things nicely, and it’s a natural choice that adds a touch of warmth to the dough. The combination of potato starch and cornstarch is what really gives these Danish their lightness, and xanthan gum? That’s the secret weapon that helps bind everything together, making sure your pastry doesn’t crumble apart.
How to Make Gluten Free Danish
Making gluten-free Danish might sound a bit intimidating, but trust me, it’s easier than you think. So, let’s roll up our sleeves and jump into this tasty adventure. First, you’ll want to preheat your oven to 350 degrees. It’s always good to get that oven warming while we mix things up, right?
Now, grab a mixing bowl and toss in 2 tablespoons of shortening along with 1/4 cup of honey. This combo is going to be the base of your dough, adding both richness and sweetness. Then, crack in 1 egg and sprinkle in 1 tablespoon of yeast. Give it a good mix to combine those ingredients, and don’t worry if it seems a bit sticky; that’s perfectly normal.
Next, it’s time to add the creaminess. Pour in 1/2 cup of sour cream, which will help create that soft texture we all love. Then, sift in the dry ingredients: 1/4 cup of potato starch, 3/4 cup of cornstarch, 1/4 teaspoon of baking soda, 1 teaspoon of baking powder, 1 teaspoon of xanthan gum, and 1/2 teaspoon of salt, followed by 1/2 teaspoon of vinegar.
Now, mix everything really well until there are no lumps left. You want this dough to be smooth because no one wants a lumpy Danish, right? Once it’s mixed to perfection, it’s time to form the pastries. Grab about 1/4 cup of dough and shape it into a small oval on a greased baking sheet. Flatten it down a little—think of it as giving your Danish a cozy little bed.
Don’t forget to make a small dent in the middle with your thumb; that’s where the magic happens. Spoon about 1 tablespoon of your favorite raspberry jam right into that dent.
After you’ve shaped and filled your Danish, it’s time for the oven. Bake them for around 15 minutes, until they turn a lovely golden brown. The aroma wafting through your kitchen will be heavenly, trust me.
While they’re baking, you can whip up a quick icing by mixing powdered sugar with a little water until it’s runny enough to drizzle. Once the Danish are done, let them cool for just a bit (it’s really hard to wait, I know), and then drizzle that icing over the top.
Enjoy your homemade gluten-free Danish, and remember, if they don’t come out perfect the first time, just think of it as a delightful learning experience. Cooking is all about having fun, right?
Gluten Free Danish Substitutions & Variations
If you’re looking to customize your gluten-free Danish, there are plenty of substitutions and variations to explore.
For sweeteners, try maple syrup or agave instead of honey. You can swap sour cream for Greek yogurt for a tangy twist. If you’re avoiding cornstarch, arrowroot or tapioca starch works well too.
For fillings, raspberry jam is delicious, but feel free to experiment with blueberry, apricot, or even cream cheese.
Want a savory option? Add herbs and cheese for a unique flair.
Don’t hesitate to play around; that’s part of the fun of baking gluten-free! Enjoy your creative journey!
Additional Tips & Notes
Experimenting with substitutions and variations can really enhance your gluten-free Danish experience.
I love adding different fillings, like cream cheese or apple slices, to switch things up. You can also try using different sweeteners, like maple syrup instead of honey, for a unique flavor.
If you’re looking for a dairy-free option, coconut yogurt works beautifully in place of sour cream. Don’t forget to sprinkle some cinnamon or nutmeg in the dough for an extra kick!
Finally, always let the danishes cool slightly before icing; it helps the icing stick better.
Enjoy the delicious journey of gluten-free baking!